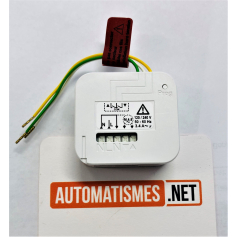
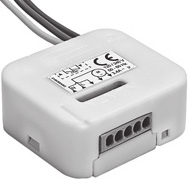
Notice SOMFY MICRO RÉCEPTEUR RTS
Produit concerné
1. Installation
Français
Le Shutter in-wall receiver RTS est compatible avec tous les moteurs filaires Somfy (I<3 A-240V ou I<3,4 A-120V).
1.1. Émetteurs compatibles (12 max.)
Le récepteur est compatible avec tous les émetteurs Somfy RTS et capteurs solaires Somfy. Se référer aux notices correspondantes.
1.2. Recommandations d'installation
- Équipement à intégrer, installation dans boîte d'encastrement ou de dérivation. Ce produit Somfy doit être installé par un professionnel de la motorisation et de l'automatisation de l'habitat auquel cette notice est destinée. L'installateur doit, par ailleurs, se conformer aux normes et à la législation en vigueur dans le pays d'installation et informer ses clients des conditions d'utilisation.
- Ne jamais brancher plusieurs récepteurs sur un moteur.
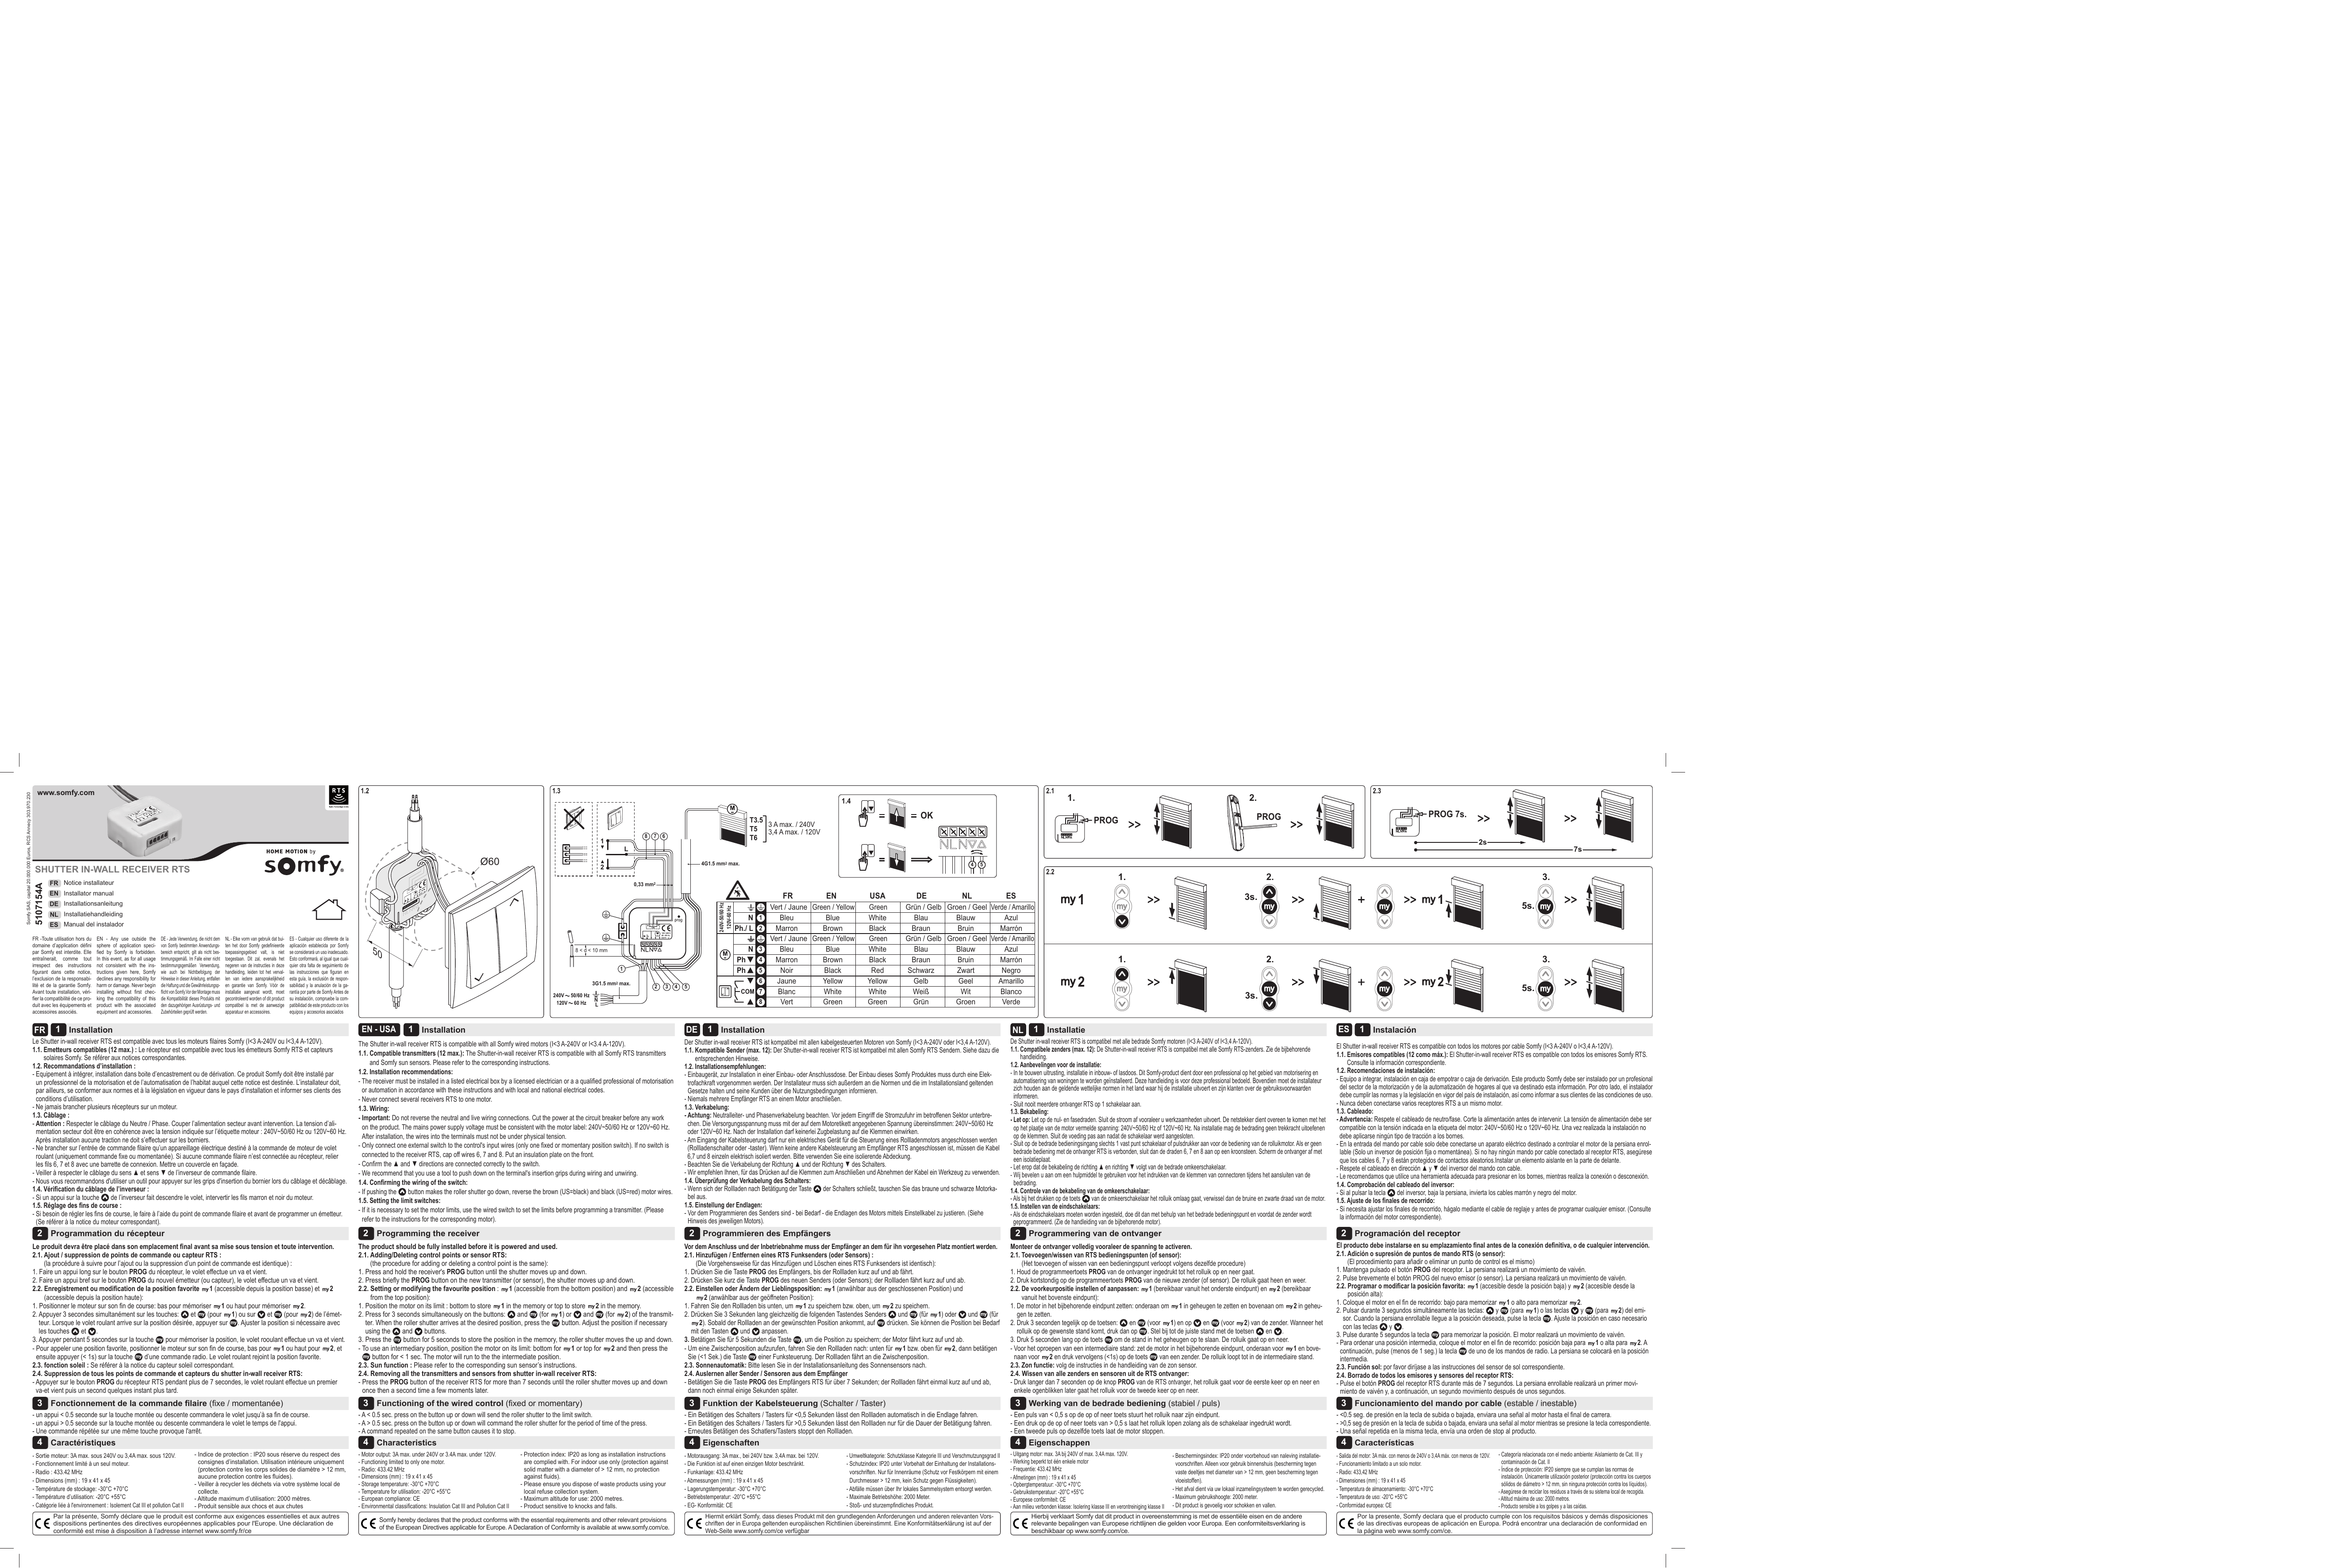
1.3. Câblage
Attention : Respecter le câblage du Neutre / Phase. Couper l'alimentation secteur avant intervention. La tension d'alimentation secteur doit être en cohérence avec la tension indiquée sur l'étiquette moteur : 240V~50/60 Hz ou 120V~60 Hz. Après installation aucune traction ne doit s'effectuer sur les borniers.
- Ne brancher sur l'entrée de commande filaire qu'un appareillage électrique destiné à la commande de moteur de volet roulant (uniquement commande fixe ou momentanée). Si aucune commande filaire n'est connectée au récepteur, relier les fils 6, 7 et 8 avec une barrette de connexion. Mettre un couvercle en façade.
- Veiller à respecter le câblage du sens ▲ et sens ▼ de l'inverseur de commande filaire.
- Nous vous recommandons d'utiliser un outil pour appuyer sur les grips d'insertion du bornier lors du câblage et décâblage.
1.4. Vérification du câblage de l'inverseur
Si un appui sur la touche de l'inverseur fait descendre le volet, intervertir les fils marron et noir du moteur.
1.5. Réglage des fins de course
Si besoin de régler les fins de course, le faire à l'aide du point de commande filaire et avant de programmer un émetteur. (Se référer à la notice du moteur correspondant).

English (USA)
The Shutter in-wall receiver RTS is compatible with all Somfy wired motors (I<3 A-240V or I<3.4 A-120V).
1.1. Compatible transmitters (12 max.)
The Shutter-in-wall receiver RTS is compatible with all Somfy RTS transmitters and Somfy sun sensors. Please refer to the corresponding instructions.
1.2. Installation recommendations
- The receiver must be installed in a listed electrical box by a licensed electrician or a qualified professional of motorisation or automation in accordance with these instructions and with local and national electrical codes.
- Never connect several receivers RTS to one motor.
1.3. Wiring
Important: Do not reverse the neutral and live wiring connections. Cut the power at the circuit breaker before any work on the product. The mains power supply voltage must be consistent with the motor label: 240V~50/60 Hz or 120V~60 Hz. After installation, the wires into the terminals must not be under physical tension.
- Only connect one external switch to the control's input wires (only one fixed or momentary position switch). If no switch is connected to the receiver RTS, cap off wires 6, 7 and 8. Put an insulation plate on the front.
- Confirm the ▲ and ▼ directions are connected correctly to the switch.
- We recommend that you use a tool to push down on the terminal's insertion grips during wiring and unwiring.
1.4. Confirming the wiring of the switch
If pushing the button makes the roller shutter go down, reverse the brown (US=black) and black (US=red) motor wires.
1.5. Setting the limit switches
If it is necessary to set the motor limits, use the wired switch to set the limits before programming a transmitter. (Please refer to the instructions for the corresponding motor).
Deutsch
Der Shutter in-wall receiver RTS ist kompatibel mit allen kabelgesteuerten Motoren von Somfy (I<3 A-240V oder I<3,4 A-120V).
1.1. Kompatible Sender (max. 12)
Der Shutter-in-wall receiver RTS ist kompatibel mit allen Somfy RTS Sendern. Siehe dazu die entsprechenden Hinweise.
1.2. Installationsempfehlungen
- Einbaugerät, zur Installation in einer Einbau- oder Anschlussdose. Der Einbau dieses Somfy Produktes muss durch eine Elektrofachkraft vorgenommen werden. Der Installateur muss sich außerdem an die Normen und die im Installationsland geltenden Gesetze halten und seine Kunden über die Nutzungsbedingungen informieren.
- Niemals mehrere Empfänger RTS an einem Motor anschließen.
1.3. Verkabelung
Achtung: Neutralleiter- und Phasenverkabelung beachten. Vor jedem Eingriff die Stromzufuhr im betroffenen Sektor unterbrechen. Die Versorgungsspannung muss mit der auf dem Motoretikett angegebenen Spannung übereinstimmen: 240V~50/60 Hz oder 120V~60 Hz. Nach der Installation darf keinerlei Zugbelastung auf die Klemmen einwirken.
- Am Eingang der Kabelsteuerung darf nur ein elektrisches Gerät für die Steuerung eines Rollladenmotors angeschlossen werden (Rollladenschalter oder -taster). Wenn keine andere Kabelsteuerung am Empfänger RTS angeschlossen ist, müssen die Kabel 6, 7 und 8 einzeln elektrisch isoliert werden. Bitte verwenden Sie eine isolierende Abdeckung.
- Beachten Sie die Verkabelung der Richtung ▲ und der Richtung ▼ des Schalters.
- Wir empfehlen Ihnen, für das Drücken auf die Klemmen zum Anschließen und Abnehmen der Kabel ein Werkzeug zu verwenden.
1.4. Überprüfung der Verkabelung des Schalters
Wenn sich der Rollladen nach Betätigung der Taste des Schalters schließt, tauschen Sie das braune und schwarze Motorkabel aus.
1.5. Einstellung der Endlagen
Vor dem Programmieren des Senders sind – bei Bedarf – die Endlagen des Motors mittels Einstellkabel zu justieren. (Siehe Hinweis des jeweiligen Motors).
Nederlands
De Shutter in-wall receiver RTS is compatibel met alle bedrade Somfy motoren (I<3 A-240V of I<3,4 A-120V).
1.1. Compatibele zenders (max. 12)
De Shutter-in-wall receiver RTS is compatibel met alle Somfy RTS-zenders. Zie de bijbehorende handleiding.
1.2. Aanbevelingen voor de installatie
- In te bouwen uitrusting, installatie in inbouw- of lasdoos. Dit Somfy-product dient door een professional op het gebied van motorisering en automatisering van woningen te worden geïnstalleerd. Deze handleiding is voor deze professional bedoeld. Bovendien moet de installateur zich houden aan de geldende wettelijke normen in het land waar hij de installatie uitvoert en zijn klanten over de gebruiksvoorwaarden informeren.
- Sluit nooit meerdere ontvanger RTS op 1 schakelaar aan.
1.3. Bekabeling
Let op: Let op de nul- en fasedraden. Sluit de stroom af vooraleer u werkzaamheden uitvoert. De netstekker dient overeen te komen met het op het plaatje van de motor vermelde spanning: 240V~50/60 Hz of 120V~60 Hz. Na installatie mag de bedrading geen trekkracht uitoefenen op de klemmen. Sluit de voeding pas aan nadat de schakelaar werd aangesloten.
- Sluit op de bedrade bedieningsingang slechts 1 vast punt schakelaar of pulsdrukker aan voor de bediening van de rolluikmotor. Als er geen bedrade bediening met de ontvanger RTS is verbonden, sluit dan de draden 6, 7 en 8 aan op een kroonsteen. Scherm de ontvanger af met een isolatieplaat.
- Let erop dat de bekabeling de richting ▲ en richting ▼ volgt van de bedrade omkeerschakelaar.
- Wij bevelen u aan om een hulpmiddel te gebruiken voor het indrukken van de klemmen van connectoren tijdens het aansluiten van de bedrading.
1.4. Controle van de bekabeling van de omkeerschakelaar
Als bij het drukken op de toets van de omkeerschakelaar het rolluik omlaag gaat, verwissel dan de bruine en zwarte draad van de motor.
1.5. Instellen van de eindschakelaars
Als de eindschakelaars moeten worden ingesteld, doe dit dan met behulp van het bedrade bedieningspunt en voordat de zender wordt geprogrammeerd. (Zie de handleiding van de bijbehorende motor).
Español
El Shutter in-wall receiver RTS es compatible con todos los motores por cable Somfy (I<3 A-240V o I<3,4 A-120V).
1.1. Emisores compatibles (12 como máx.)
El Shutter-in-wall receiver RTS es compatible con todos los emisores Somfy RTS. Consulte la información correspondiente.
1.2. Recomendaciones de instalación
- Equipo a integrar, instalación en caja de empotrar o caja de derivación. Este producto Somfy debe ser instalado por un profesional del sector de la motorización y de la automatización de hogares al que va destinada esta información. Por otro lado, el instalador debe cumplir las normas y la legislación en vigor del país de instalación, así como informar a sus clientes de las condiciones de uso.
- Nunca deben conectarse varios receptores RTS a un mismo motor.
1.3. Cableado
Advertencia: Respete el cableado de neutro/fase. Corte la alimentación antes de intervenir. La tensión de alimentación debe ser compatible con la tensión indicada en la etiqueta del motor: 240V~50/60 Hz o 120V~60 Hz. Una vez realizada la instalación no debe aplicarse ningún tipo de tracción a los bornes.
- En la entrada del mando por cable solo debe conectarse un aparato eléctrico destinado a controlar el motor de la persiana enrollable (Solo un inversor de posición fija o momentánea). Si no hay ningún mando por cable conectado al receptor RTS, asegúrese que los cables 6, 7 y 8 están protegidos de contactos aleatorios. Instalar un elemento aislante en la parte de delante.
- Respete el cableado en dirección ▲ y ▼ del inversor del mando con cable.
- Le recomendamos que utilice una herramienta adecuada para presionar en los bornes, mientras realiza la conexión o desconexión.
1.4. Comprobación del cableado del inversor
Si al pulsar la tecla del inversor, baja la persiana, invierta los cables marrón y negro del motor.
1.5. Ajuste de los finales de recorrido
Si necesita ajustar los finales de recorrido, hágalo mediante el cable de reglaje y antes de programar cualquier emisor. (Consulte la información del motor correspondiente).
Tableau de correspondance des fils / Wiring colour reference
| Borne | FR | EN | USA | DE | NL | ES |
|---|---|---|---|---|---|---|
| N | Vert / Jaune | Green / Yellow | Green | Grün / Gelb | Groen / Geel | Verde / Amarillo |
| — | Bleu | Blue | White | Blau | Blauw | Azul |
| Ph. / L | Marron | Brown | Black | Braun | Bruin | Marrón |
| 3 / 4 (moteur) | Bleu / Marron | Blue / Brown | White / Red | Blau / Braun | Blauw / Bruin | Azul / Marrón |
| Noir | Noir | Black | Red | Schwarz | Zwart | Negro |
| — | Blanc | White | White | Weiß | Wit | Blanco |
| 8 | Jaune | Yellow | Yellow | Gelb | Geel | Amarillo |
| COM | Vert / Jaune | Green / Yellow | Green | Grün / Gelb | Groen / Geel | Verde / Amarillo |
2. Programmation du récepteur
Français
Le produit devra être placé dans son emplacement final avant sa mise sous tension et toute intervention.
2.1. Ajout / suppression de points de commande ou capteur RTS
(la procédure à suivre pour l'ajout ou la suppression d'un point de commande est identique) :
- Faire un appui long sur le bouton PROG du récepteur, le volet effectue un va-et-vient.
- Faire un appui bref sur le bouton PROG du nouvel émetteur (ou capteur), le volet effectue un va-et-vient.
2.2. Enregistrement ou modification de la position favorite 1 (accessible depuis la position basse) et 2 (accessible depuis la position haute)
- Positionner le moteur sur son fin de course : bas pour mémoriser 1 ou haut pour mémoriser 2.
- Appuyer 3 secondes simultanément sur les touches montée et descente (pour 1) ou descente et stop (pour 2) de l'émetteur. Lorsque le volet roulant arrive sur la position désirée, appuyer sur stop. Ajuster la position si nécessaire avec les touches montée et descente.
- Appuyer pendant 5 secondes sur la touche my pour mémoriser la position, le volet roulant effectue un va-et-vient.
Pour appeler une position favorite, positionner le moteur sur son fin de course, bas pour 1 ou haut pour 2, et ensuite appuyer (< 1s) sur la touche my d'une commande radio. Le volet roulant rejoint la position favorite.
2.3. Fonction soleil
Se référer à la notice du capteur soleil correspondant.
2.4. Suppression de tous les points de commande et capteurs du shutter in-wall receiver RTS
Appuyer sur le bouton PROG du récepteur RTS pendant plus de 7 secondes, le volet roulant effectue un premier va-et-vient puis un second quelques instants plus tard.
English (USA)
The product should be fully installed before it is powered and used.
2.1. Adding / Deleting control points or sensor RTS
(the procedure for adding or deleting a control point is the same):
- Press and hold the receiver's PROG button until the shutter moves up and down.
- Press briefly the PROG button on the new transmitter (or sensor), the shutter moves up and down.
2.2. Setting or modifying the favourite position: 1 (accessible from the bottom position) and 2 (accessible from the top position)
- Position the motor on its limit: bottom to store 1 in the memory or top to store 2 in the memory.
- Press for 3 seconds simultaneously on the up and down buttons (for 1) or down and stop (for 2) of the transmitter. When the roller shutter arrives at the desired position, press the stop button. Adjust the position if necessary using the up and down buttons.
- Press the my button for 5 seconds to store the position in the memory, the roller shutter moves up and down.
To use an intermediary position, position the motor on its limit: bottom for 1 or top for 2 and then press the my button for < 1 sec. The motor will run to the intermediate position.
2.3. Sun function
Please refer to the corresponding sun sensor's instructions.
2.4. Removing all the transmitters and sensors from shutter in-wall receiver RTS
Press the PROG button of the receiver RTS for more than 7 seconds until the roller shutter moves up and down once then a second time a few moments later.
Deutsch
Vor dem Anschluss und der Inbetriebnahme muss der Empfänger an dem für ihn vorgesehenen Platz montiert werden.
2.1. Hinzufügen / Entfernen eines RTS Funksenders (oder Sensors)
(Die Vorgehensweise für das Hinzufügen und Löschen eines RTS Funksenders ist identisch):
- Drücken Sie die Taste PROG des Empfängers, bis der Rollladen kurz auf und ab fährt.
- Drücken Sie kurz die Taste PROG des neuen Senders (oder Sensors); der Rollladen fährt kurz auf und ab.
2.2. Einstellen oder Ändern der Lieblingsposition: 1 (anwählbar aus der geschlossenen Position) und 2 (anwählbar aus der geöffneten Position)
- Fahren Sie den Rollladen bis unten, um 1 zu speichern bzw. oben, um 2 zu speichern.
- Drücken Sie 3 Sekunden lang gleichzeitig die folgenden Tasten des Senders Auf und Ab (für 1) oder Ab und Stopp (für 2). Sobald der Rollladen an der gewünschten Position ankommt, auf Stopp drücken. Sie können die Position bei Bedarf mit den Tasten Auf und Ab anpassen.
- Betätigen Sie für 5 Sekunden die Taste my, um die Position zu speichern; der Motor fährt kurz auf und ab.
Um eine Zwischenposition aufzurufen, fahren Sie den Rollladen nach: unten für 1 bzw. oben für 2, dann betätigen Sie (<1 Sek.) die Taste my einer Funksteuerung. Der Rollladen fährt an die Zwischenposition.
2.3. Sonnenautomatik
Bitte lesen Sie in der Installationsanleitung des Sonnensensors nach.
2.4. Auslernen aller Sender / Sensoren aus dem Empfänger
Betätigen Sie die Taste PROG des Empfängers RTS für über 7 Sekunden; der Rollladen fährt einmal kurz auf und ab, dann noch einmal einige Sekunden später.
Nederlands
Monteer de ontvanger volledig vooraleer de spanning te activeren.
2.1. Toevoegen / wissen van RTS bedieningspunten (of sensor)
(Het toevoegen of wissen van een bedieningspunt verloopt volgens dezelfde procedure)
- Houd de programmeertoets PROG van de ontvanger ingedrukt tot het rolluik op en neer gaat.
- Druk kortstondig op de programmeertoets PROG van de nieuwe zender (of sensor). Het rolluik gaat heen en weer.
2.2. De voorkeurpositie instellen of aanpassen: 1 (bereikbaar vanuit het onderste eindpunt) en 2 (bereikbaar vanuit het bovenste eindpunt)
- De motor in het bijbehorende eindpunt zetten: onderaan om 1 in geheugen te zetten en bovenaan om 2 in geheugen te zetten.
- Druk 3 seconden tegelijk op de toetsen op en neer (voor 1) en op neer en stop (voor 2) van de zender. Wanneer het rolluik op de gewenste stand komt, druk dan op stop. Stel bij tot de juiste stand met de toetsen op en neer.
- Druk 5 seconden lang op de toets my om de stand in het geheugen op te slaan. Het rolluik gaat op en neer.
Voor het oproepen van een intermediaire stand: zet de motor in het bijbehorende eindpunt, onderaan voor 1 en bovenaan voor 2 en druk vervolgens (<1s) op de toets my van een zender. Het rolluik loopt tot in de intermediaire stand.
2.3. Zon functie
Volg de instructies in de handleiding van de zon sensor.
2.4. Wissen van alle zenders en sensoren uit de RTS ontvanger
Druk langer dan 7 seconden op de knop PROG van de RTS ontvanger, het rolluik gaat voor de eerste keer op en neer en enkele ogenblikken later gaat het rolluik voor de tweede keer op en neer.
Español
El producto debe instalarse en su emplazamiento final antes de la conexión definitiva, o de cualquier intervención.
2.1. Adición o supresión de puntos de mando RTS (o sensor)
(El procedimiento para añadir o eliminar un punto de control es el mismo)
- Mantenga pulsado el botón PROG del receptor. La persiana realizará un movimiento de vaivén.
- Pulse brevemente el botón PROG del nuevo emisor (o sensor). La persiana realizará un movimiento de vaivén.
2.2. Programar o modificar la posición favorita: 1 (accesible desde la posición baja) y 2 (accesible desde la posición alta)
- Coloque el motor en el fin de recorrido: bajo para memorizar 1 o alto para memorizar 2.
- Pulsar durante 3 segundos simultáneamente las teclas subida y bajada (para 1) o las teclas bajada y stop (para 2) del emisor. Cuando la persiana enrollable llegue a la posición deseada, pulse la tecla stop. Ajuste la posición en caso necesario con las teclas subida y bajada.
- Pulse durante 5 segundos la tecla my para memorizar la posición. El motor realizará un movimiento de vaivén.
Para ordenar una posición intermedia, coloque el motor en el fin de recorrido: posición baja para 1 o alta para 2. A continuación, pulse (menos de 1 seg.) la tecla my de uno de los mandos de radio. La persiana se colocará en la posición intermedia.
2.3. Función sol
Por favor diríjase a las instrucciones del sensor de sol correspondiente.
2.4. Borrado de todos los emisores y sensores del receptor RTS
Pulse el botón PROG del receptor RTS durante más de 7 segundos. La persiana enrollable realizará un primer movimiento de vaivén y, a continuación, un segundo movimiento después de unos segundos.
3. Fonctionnement de la commande filaire (fixe / momentanée)
Français
- Un appui < 0,5 seconde sur la touche montée ou descente commandera le volet jusqu'à sa fin de course.
- Un appui > 0,5 seconde sur la touche montée ou descente commandera le volet le temps de l'appui.
- Une commande répétée sur une même touche provoque l'arrêt.
English (USA)
- A < 0.5 sec. press on the button up or down will send the roller shutter to the limit switch.
- A > 0.5 sec. press on the button up or down will command the roller shutter for the period of time of the press.
- A command repeated on the same button causes it to stop.
Deutsch
- Ein Betätigen des Schalters / Tasters für <0,5 Sekunden lässt den Rollladen automatisch in die Endlage fahren.
- Ein Betätigen des Schalters / Tasters für >0,5 Sekunden lässt den Rollladen nur für die Dauer der Betätigung fahren.
- Erneutes Betätigen des Schalters / Tasters stoppt den Rollladen.
Nederlands
- Een puls van < 0,5 s op de op of neer toets stuurt het rolluik naar zijn eindpunt.
- Een druk op de op of neer toets van > 0,5 s laat het rolluik lopen zolang als de schakelaar ingedrukt wordt.
- Een tweede puls op dezelfde toets laat de motor stoppen.
Español
- <0,5 seg. de presión en la tecla de subida o bajada, enviará una señal al motor hasta el final de carrera.
- >0,5 seg. de presión en la tecla de subida o bajada, enviará una señal al motor mientras se presione la tecla correspondiente.
- Una señal repetida en la misma tecla, envía una orden de stop al producto.
4. Caractéristiques techniques
| Caractéristique | Valeur |
|---|---|
| Sortie moteur | 3 A max. sous 240V ou 3,4 A max. sous 120V |
| Fonctionnement | Limité à un seul moteur |
| Radio | 433,42 MHz |
| Dimensions (mm) | 19 × 41 × 45 |
| Température de stockage | -30 °C à +70 °C |
| Température d'utilisation | -20 °C à +55 °C |
| Conformité européenne | CE |
| Catégorie liée à l'environnement | Isolement Cat. III et pollution Cat. II |
| Indice de protection | IP20 sous réserve du respect des consignes d'installation. Utilisation intérieure uniquement (protection contre les corps solides de diamètre > 12 mm, aucune protection contre les fluides) |
| Altitude maximum d'utilisation | 2000 mètres |
| Sensibilité | Produit sensible aux chocs et aux chutes |
Veiller à recycler les déchets via votre système local de collecte. / Please ensure you dispose of waste products using your local refuse collection system. / Abfälle müssen über Ihr lokales Sammelsystem entsorgt werden. / Het afval dient via uw lokaal inzamelingsysteem te worden gerecycled. / Asegúrese de reciclar los residuos a través de su sistema local de recogida.
Conditions d'utilisation et garantie
FR — Toute utilisation hors du domaine d'application défini par Somfy est interdite. Elle entraînerait, comme tout irrespect des instructions figurant dans cette notice, l'exclusion de la responsabilité et de la garantie Somfy. Avant toute installation, vérifier la compatibilité de ce produit avec les équipements et accessoires associés.
EN — Any use outside the sphere of application specified by Somfy is forbidden. In this event, as for all usage not consistent with the instructions given here, Somfy declines any responsibility for harm or damage. Never begin installing without first checking the compatibility of this product with the associated equipment and accessories.
DE — Jede Verwendung, die nicht dem von Somfy bestimmten Anwendungsbereich entspricht, gilt als nicht bestimmungsgemäß. Im Falle einer nicht bestimmungsgemäßen Verwendung, wie auch bei Nichtbefolgung der Hinweise in dieser Anleitung, entfallen die Haftung und die Gewährleistungspflicht von Somfy. Vor der Montage muss die Kompatibilität dieses Produkts mit den dazugehörigen Ausrüstungs- und Zubehörteilen geprüft werden.
NL — Elke vorm van gebruik dat buiten het door Somfy gedefinieerde toepassingsgebied valt, is niet toegestaan. Dit zal, evenals het negeren van de instructies in deze handleiding, leiden tot het vervallen van iedere aansprakelijkheid en garantie van Somfy. Vóór de installatie aangevat wordt, moet gecontroleerd worden of dit product compatibel is met de aanwezige apparatuur en accessoires.
ES — Cualquier uso diferente de la aplicación establecida por Somfy se considerará un uso inadecuado. Esto conformará, al igual que cualquier otra falta de seguimiento de las instrucciones que figuran en esta guía, la exclusión de responsabilidad y la anulación de la garantía por parte de Somfy. Antes de su instalación, compruebe la compatibilidad de este producto con los equipos y accesorios asociados.
Déclaration de conformité
Par la présente, Somfy déclare que le produit est conforme aux exigences essentielles et aux autres dispositions pertinentes des directives européennes applicables pour l'Europe. Une déclaration de conformité est mise à disposition à l'adresse internet www.somfy.fr/ce.
Somfy hereby declares that the product conforms with the essential requirements and other relevant provisions of the European Directives applicable for Europe. A Declaration of Conformity is available at www.somfy.com/ce.
Hiermit erklärt Somfy, dass dieses Produkt mit den grundlegenden Anforderungen und anderen relevanten Vorschriften der in Europa geltenden europäischen Richtlinien übereinstimmt. Eine Konformitätserklärung ist auf der Web-Seite www.somfy.com/ce verfügbar.
Hierbij verklaart Somfy dat dit product in overeenstemming is met de essentiële eisen en de andere relevante bepalingen van Europese richtlijnen die gelden voor Europa. Een conformiteitsverklaring is beschikbaar op www.somfy.com/ce.
Por la presente, Somfy declara que el producto cumple con los requisitos básicos y demás disposiciones de las directivas europeas de aplicación en Europa. Podrá encontrar una declaración de conformidad en la página web www.somfy.com/ce.